
Managing your team members
Managing your team members
The Team Members page is where you find people, check their status, change what they have access to, and remove them. This article covers the list itself, the individual member record, and the actions you can take on several people at once.
The members list
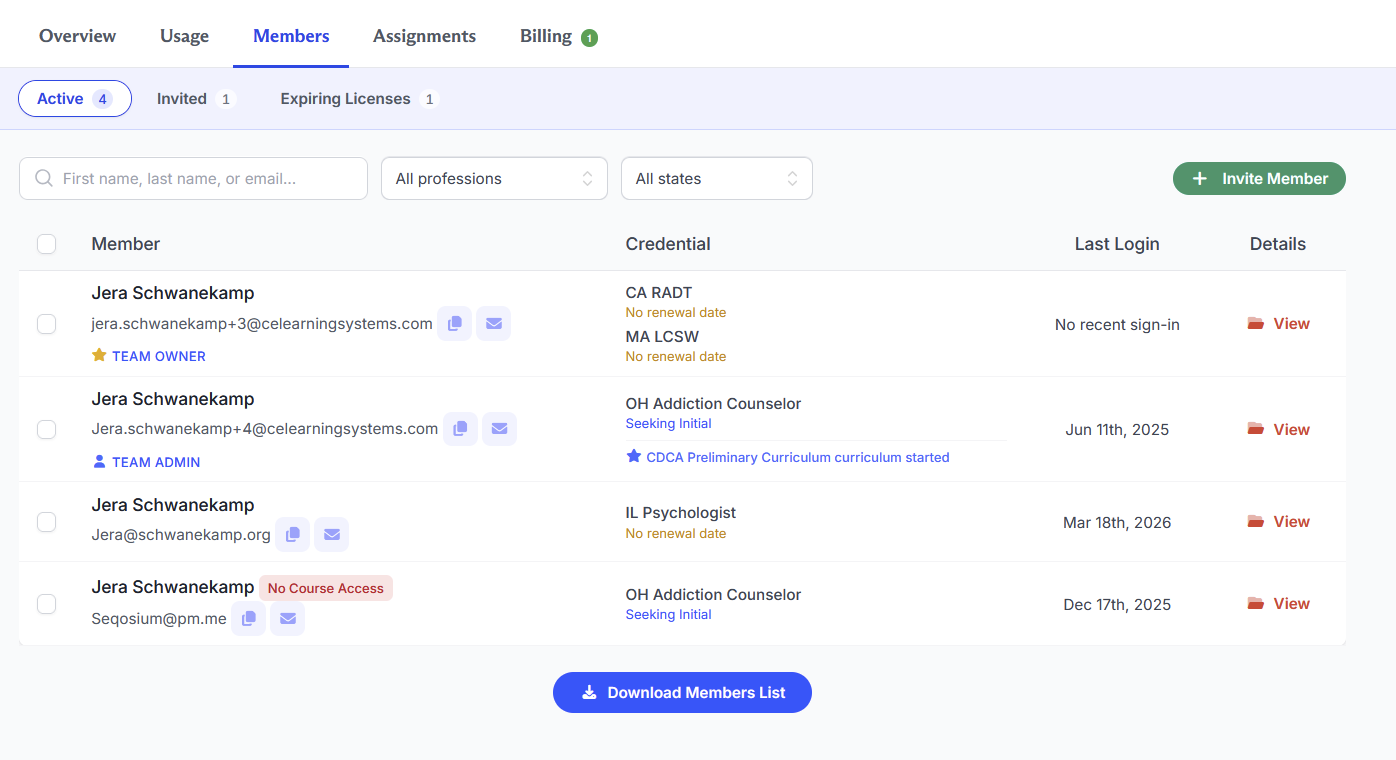
Three controls sit above the list:
- Search. Type a name to filter the list.
- All professions. Narrow to a single profession.
- All states. Narrow to a single state.
The list itself has three columns.
Member shows the person's name and email address, with two small icons underneath. The copy icon copies their email address to your clipboard. The envelope icon opens an email to them. Role badges appear here too, so you can see at a glance who your TEAM OWNER and TEAM ADMIN are. A red No Course Access badge means that person has no seat. See How team seats work.
Credential lists the licenses and certifications the member has entered on their own account, along with each renewal date. If no date has been entered you will see No renewal date in orange.
Note: Only the member can enter their own license information. There is no way for a team administrator to add or edit it for them. If the Credential column is empty or a renewal date is missing, the fix is to ask the member to add it to their account.
Details opens that person's full member record.
Download Members List at the bottom of the page gives you a shareable spreadsheet of everyone on the team.
The member record
Clicking the view icon in the Details column opens a single member's record. It has four parts.
Course access: A row at the top showing the member's course access status. The pencil icon on this row is where you assign a seat if their access has expired, or remove course access if you want to free the seat without removing the person from the team.
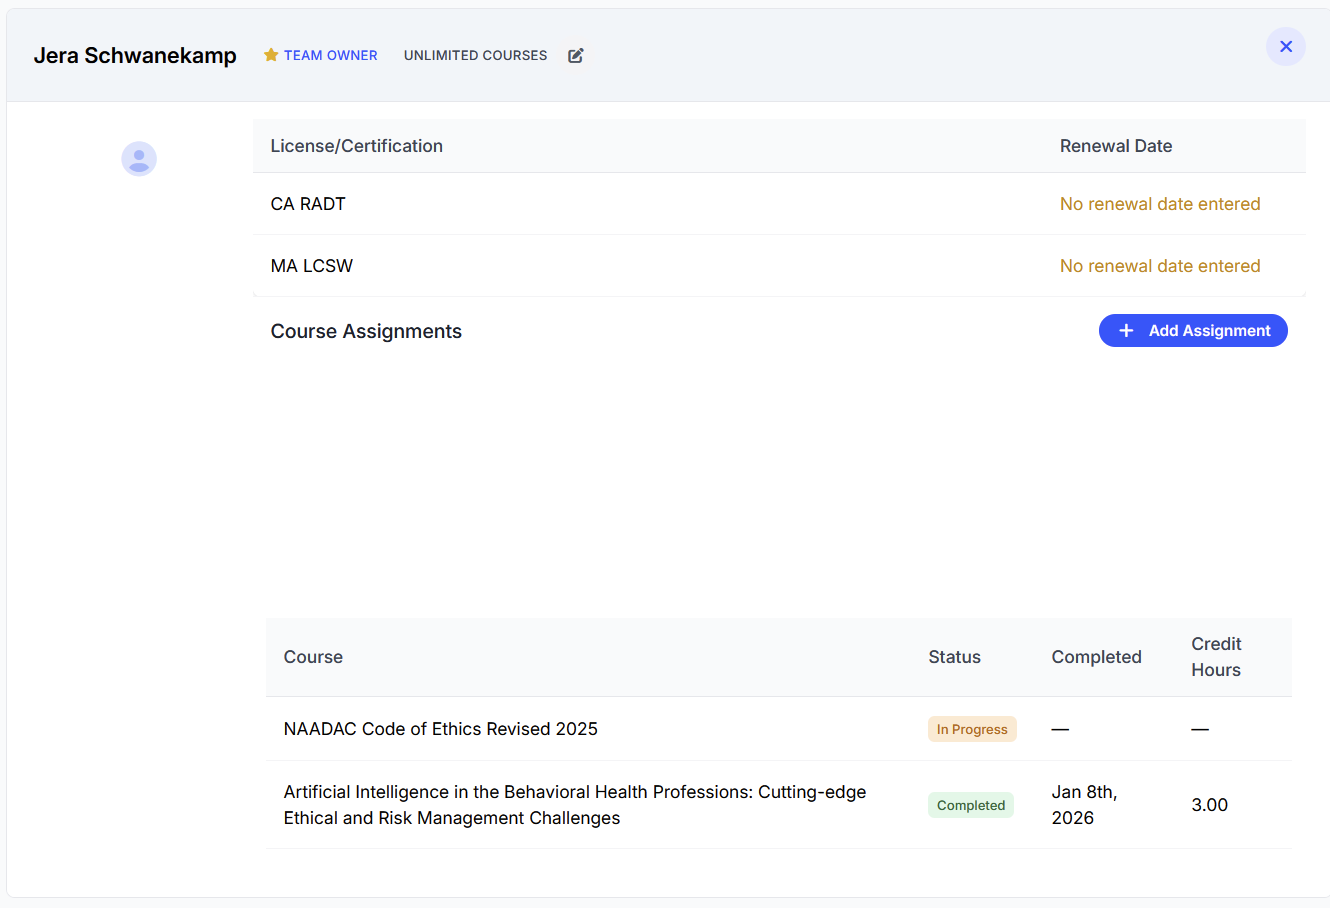
License/Certification. The licenses the member has entered, with renewal dates. Read only, since only the member can change these.
Course Assignments. Everything currently assigned to this person, with a status column and a trash icon on each row. A checkmark means completed, a dash means not yet. + Add Assignment at the top right assigns another course to this one person.
Course history. Every course this member has touched, with status, completion date, and credit hours earned.
Acting on several members at once
Each row in the members list has a checkbox on the left. Select two or more and the header changes to show how many are selected, and a Bulk Actions menu appears in place of + Invite Member.
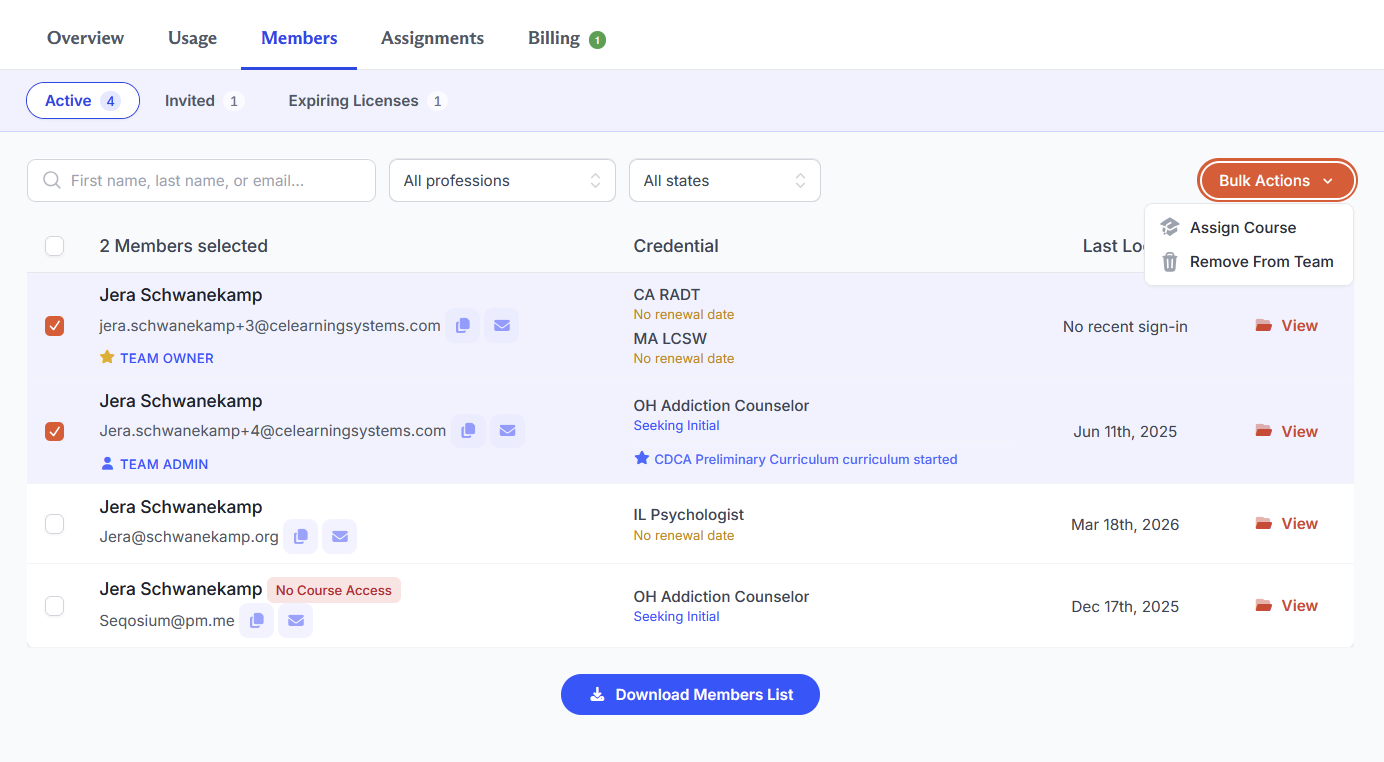
Bulk Actions offers two options:
- Assign course. Assigns a course to everyone you have selected. See Assigning courses to your team.
- Remove from team. Removes everyone you have selected.
The checkbox in the header row selects everyone at once.
Removing a member
Remove somebody either through Bulk Actions on the members list, or from their individual member record.
Removing a member frees their seat. What they lose is the course access your team was paying for.
Their completions stay in your team usage report, so your training records stay intact for audits. See Usage reports and expiring licenses.
Questions? Comments?
We're here to help. Contact us using the Help icon at bottom-right of the page, call our live support at 1-888-459-1680 M-F 7:00 AM PST - 4:00 PM PST, click this link to Contact Us or email us at [email protected]. We have staff ready to assist you!